Wall Command
Overview
The “Wall Command” adds a new IfcWallStandardCase instance to the model.
The wall is created as an extruded solid. The profile selected in the “ProfileDef”
property is extruded along the axis from the start point to the end point you specify.
The profile is placed so that the bottom of the wall rests on that axis, which means the
YDim of the profile becomes the height of the wall and the XDim of the profile becomes
the thickness of the wall.
The new wall is added to the building storey selected in the “Storey” property.
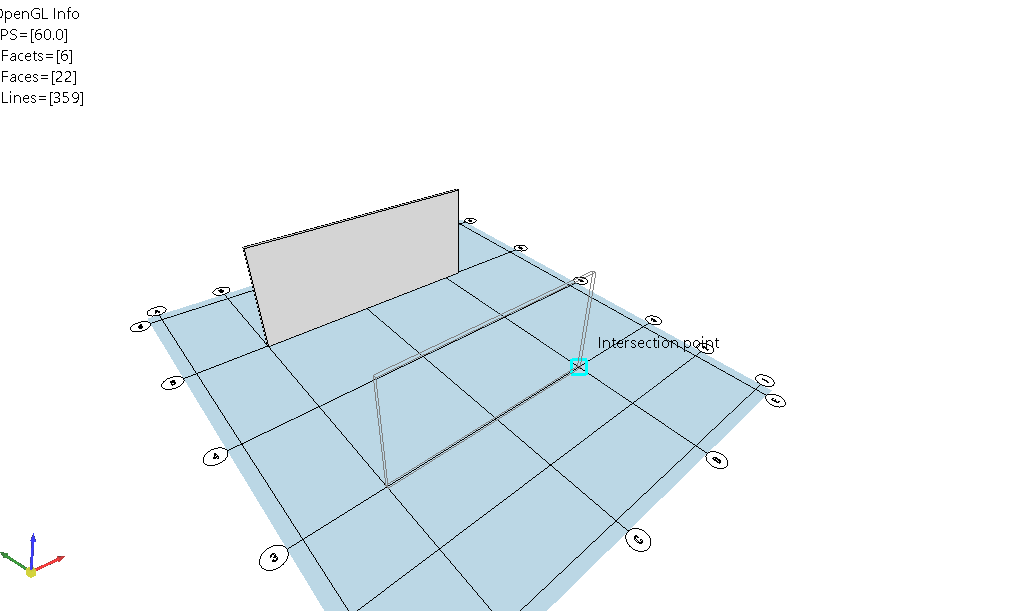
Specifying the end point of a wall in the 3D view. The marker shows the “Intersection
point” object snap picking up the crossing of two grid lines.
The command can be started in any of the following ways:
- Click the “Wall” button on the Elements panel of the Home tab.
- Right-click an IfcProfileDef node in the tree view and choose “Wall” from the
context menu. The profile you right-clicked is used for the new wall. - Enter “_CliCmdCreateBuildingElementWall” (or its alias “wall”) in the prompt window.
Usage
Here is an explanation of how the “Wall Command” is typically used:
-
Start the command. The Property View switches to the settings of the command.
-
Check the settings in the Property View and change them if necessary. At least
“ProfileDef” and “Storey” must be set, otherwise the command reports an error. -
Specify the start point of the wall when the prompt “Start position” is displayed.
-
Specify the end point of the wall when the prompt “End position” is displayed. The
wall is created between the two points and the #id of the new instance is printed in
the prompt window. -
Continue specifying start and end points to place further walls. Press Esc to finish
the command.
The settings you used are stored, so the next time the command is started the same
profile and storey are offered again.
Controls
| Control | Description |
|---|---|
| ProfileDef | Select the IfcProfileDef used as the section of the wall. Its XDim is the thickness and its YDim is the height |
| Storey | Select the IfcBuildingStorey the wall is added to |
| Start | Shows the start point specified in the view |
| End | Shows the end point specified in the view |
| _Length | Shows the distance between the start point and the end point. Read only |
| Name | Specify the name of the IfcWallStandardCase |
| Description | Specify the description of the IfcWallStandardCase |
| Tag | Specify the tag of the IfcWallStandardCase |
| ObjectType | Specify the object type of the IfcWallStandardCase |
| Ownerhistory | Select the IfcOwnerHistory of the IfcWallStandardCase |
| ContextOfItems | Select the IfcRepresentationContext used by the shape representation |
| Globalid | Specify the GUID of the IfcWallStandardCase |
Messages
The following messages are displayed in the prompt window when the input is not valid.
| Message | Description |
|---|---|
| The length between the start and end point must be greater than 0.0. | The start point and the end point are the same point |
| The input value “ProfileDef” is null. | No IfcProfileDef is selected |
| The input value “Storey” is null. | No IfcBuildingStorey is selected |
Command Name
_CliCmdCreateBuildingElementWall
Alias
wall